Thursday, May 29, 2014

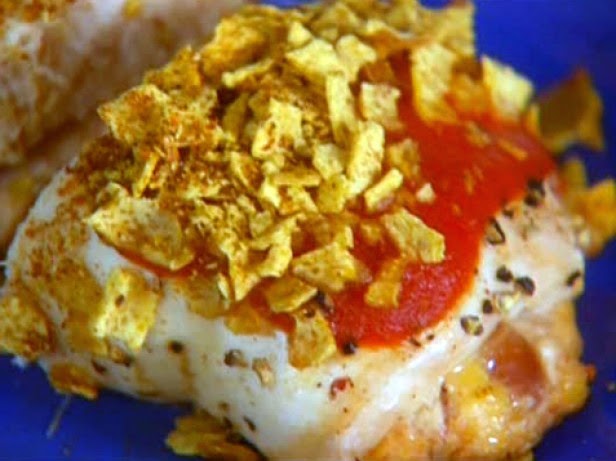
Nacho Stuffed Chicken


Would you believe this chicken stuffed with refried beans and cheese, topped with more cheese and crushed tortilla chips is healthy?

The Captain and I will be looking into using more of Hungry Girl's recipes since we are modifying our eating lifestyle with a balance of healthy meals along with our favorites.


Recipe and photo courtesy of 
The Cooking Channel
2010 Hungry Girl. All Rights Reserved. Show: Hungry GirlEpisode: To the Mex


Ingredients


    • 1/2 cup fat-free refried beans
    • 4 wedges light spreadable Swiss cheese (recommended: The Laughing Cow), room temperature
    • 1/4 cup shredded fat-free Cheddar cheese
    • 16 low-fat baked tortilla chips
    • 1 teaspoon dry taco seasoning mix
    • 4 (5-ounce) raw, boneless, skinless lean chicken breast cutlets, pounded to 1/3-inch thickness
    • Salt and freshly ground black pepper
    • 1/4 cup taco sauce
    • Fat-free sour cream, for topping, optional
    • Salsa, for topping, optional


Directions

Preheat the oven to 350 degrees F. Spray a baking sheet with nonstick spray and set aside.

To make the filling: Combine beans, cheese wedges, and shredded cheese in a bowl. Mix thoroughly and set aside.

Put chips in a sealable plastic bag and crush with your hands or a rolling pin. Add taco seasoning and give it a good shake to mix. Transfer crumb mixture to a plate and set aside.

Place cutlets flat on a clean, dry surface, and season with salt and black pepper. Spoon filling onto the centers of the cutlets, dividing it evenly among them. Carefully roll each cutlet up over the filling (which may ooze a little, but don't worry!) and secure with toothpicks, if needed. Transfer to the baking sheet.

Cover each stuffed cutlet with 1 tablespoon taco sauce, using the back of the spoon or your fingers to coat. Coat cutlets with crumb mixture.

Cover the baking sheet with foil, and bake in the oven for 20 minutes.

Carefully remove foil. Bake until chicken is cooked through and outsides are crispy, about 15 additional minutes.

Let cool slightly and top with sour cream and salsa, if using. Enjoy!


PER SERVING (1/4th of recipe, 1 stuffed chicken cutlet): 270 calories, 4.25g fat, 780mg sodium, 13g carbs, 2g fiber, 1.5g sugars, 40g protein

Chicken-Broccoli au Gratin


The combination of chicken and broccoli is one of my favorites.  This semi-homemade recipe is courtesy of Pillsbury.  You can substitute the convenience foods to make a frugal version of the casserole.

Please note that this recipe is for two servings.


Ingredients

    • 1 tablespoon olive oil
    • 1 cup sliced fresh mushrooms
    • 1 small onion, sliced (1/2 cup)
    • 1 box (10 oz) Green Giant™ frozen broccoli & zesty cheese sauce
    • 2/3 cup ricotta cheese
    • 1 cup chopped cooked chicken
    • 1 can (4 oz) Pillsbury™ refrigerated crescent dinner rolls (4 rolls)

Directions 

Heat oven to 375°F. 

In 10-inch skillet, heat oil over medium-high heat. Add mushrooms and onion; cook 5 to 7 minutes, stirring frequently, until tender. 

Meanwhile, microwave broccoli with cheese sauce as directed on box. 

Spread 1/3 cup ricotta cheese in bottom of each of 2 ungreased 2-cup au gratin dishes or individual casseroles.* 

Top each evenly with chicken, mushroom mixture and broccoli with cheese sauce. 

Unroll dough; separate into 2 rectangles. Place 1 rectangle over top of each dish, tucking corners into dish as needed. 

Place dishes on cookie sheet; bake 20 to 25 minutes or until tops are golden brown and edges are bubbly. 


Notes from Pillsbury:

*Recipe can be made in ungreased 8-inch square (2-quart) glass baking dish. Spread ricotta cheese in dish; top with chicken, mushroom mixture and broccoli with cheese sauce. Arrange dough rectangles over top. Bake as directed.

Wednesday, May 28, 2014

Blackberry Cheesecake Squares


When it is any type of cheesecake, it gets my attention.  

I saw Ree make this cheesecake on The Pioneer Woman this afternoon and what I loved best (besides it being cheesecake) is the crust.  Vanilla wafers and pecans sounds like a delicious crust that I'd like to try out real soon.


Recipe courtesy of Ree Drummond
The Food Network
SHOW: The Pioneer Woman
EPISODE: Make Ahead Potluck


Ingredients

Crust:

    • Cooking spray, for spraying foil
    • One 11-ounce box vanilla wafers
    • 1/2 cup pecans
    • 1 stick (1/2 cup) butter, melted

Filling:

    • Three 8-ounce packages cream cheese
    • 1 1/2 cups sugar
    • 1 1/2 teaspoons vanilla
    • 4 eggs
    • 1/2 cup sour cream

Topping:

    • 4 cups blackberries
    • 1 cup sugar
    • 1 tablespoon cornstarch


Directions

Preheat the oven to 350 degrees F.

For the crust: Line a 9-by-13-inch rectangular baking pan with foil and spray with cooking spray.

Place the vanilla wafers and pecans into the bowl of a food processor and pulse until the mixture becomes crumbs. Add the melted butter and pulse again until combined. Pour the mixture into the prepared pan and press the crumbs into the bottom of the pan. (If they come up the sides, that's okay!)

For the filling: Beat the cream cheese, sugar and vanilla together in a medium bowl with an electric mixer until smooth. Add the eggs one at a time, beating after each addition. Add the sour cream and mix again.

Pour the filling into the crust, smooth the top and bake for 50 minutes. Turn off the oven, open the oven door and allow the pan to sit in the open oven for 15 minutes. Remove and set aside to cool.

For the topping: Add the blackberries, sugar and 1/4 cup water to a saucepan or skillet. Bring to a boil over medium-high heat and cook until the juices thicken slightly, 4 to 5 minutes.

In a small bowl, make a slurry by stirring together the cornstarch and 2 tablespoons water until smooth. Add the slurry to the berries, return to the boil and cook for another 1 to 2 minutes. Turn off the heat and cool the mixture.

Pour the blackberries over the cheesecake and place the pan into the fridge to cool and set for at least 2 hours (several hours is better).

When ready to serve, remove the cheesecake from the pan by lifting the edges of the foil. Slice into 15 pieces with a long serrated knife.


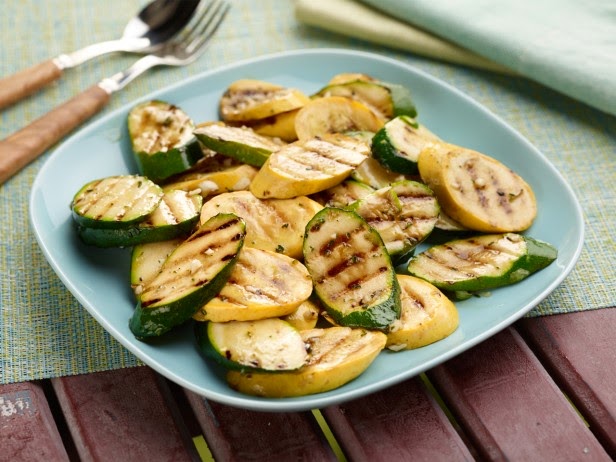
Marinated Zucchini and Summer Squash


The Captain and I are looking for healthier alternatives for snacks and side dishes and these grilled marinated veggies are perfect!  Finding new recipes for marinades and sauces will be great for variation for both veggies and meats.


Recipe courtesy Giada De Laurentiis
The Cooking Channel


INGREDIENTS

    • 2 tablespoons white wine vinegar 
    • 2 tablespoons fresh lemon juice 
    • 1 tablespoon minced garlic 
    • 2 teaspoons chopped fresh thyme leaves 
    • Salt and freshly ground black pepper 
    • 1/3 cup extra-virgin olive oil 
    • 1 pound zucchini (about 3 large), trimmed and sliced diagonally about 1/4-inch thick 
    • 1 pound yellow crookneck squash (about 3 large), trimmed and sliced diagonally about 1/4-inch thick 

DIRECTIONS

Whisk the vinegar, lemon juice, garlic, and thyme in a large bowl to blend. Season with salt and pepper.

Gradually whisk in the oil. Spoon 3 tablespoons of the marinade into a small bowl. Cover and set aside. 

Add the zucchini and yellow squash to the remaining marinade in the large bowl and toss to coat. 

Transfer the mixture to a 13 by 9 by 2-inch glass baking dish. 

Cover and marinate at room temperature at least 3 hours or cover and refrigerate up to 1 day.

Prepare the grill for medium-high heat. Grill the vegetables until they are crisp-tender and brown, turning occasionally, about 8 minutes. 

Transfer the vegetables to a platter. Drizzle with the reserved marinade and serve hot or at room temperature.


Visit Our Etsy Shop