Saturday, May 31, 2014

Healthy Tuscan Chicken


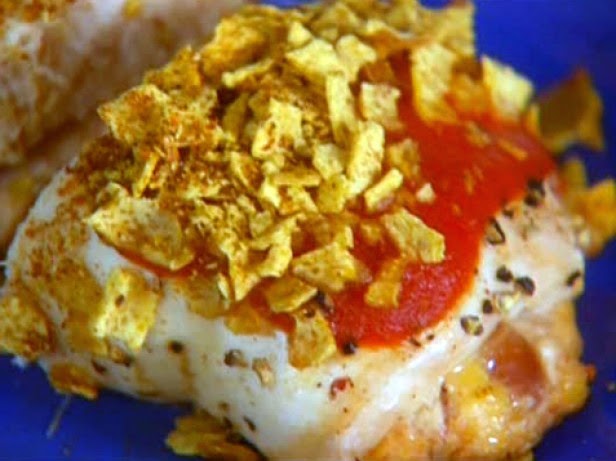
Love all the ingredients in this healthy chicken recipe!

I'd also use this recipe for fish . . .


Ingredients

    • 4 boneless skinless chicken breast halves (6 ounces each)
    • 1/4 teaspoon pepper
    • 2 tablespoons olive oil
    • 1 each medium green, sweet red and yellow peppers, julienned
    • 2 thin slices prosciutto or deli ham, chopped
    • 2 garlic cloves, minced
    • 1 can (14-1/2 ounces) diced tomatoes, undrained
    • 1/4 cup reduced-sodium chicken broth
    • 2 tablespoons minced fresh basil or 2 teaspoons dried basil
    • 1 teaspoon minced fresh oregano or 1/4 teaspoon dried oregano


Directions

Sprinkle chicken with pepper. In a large nonstick skillet, brown chicken in oil. Remove and keep warm. In the same skillet, saute peppers and prosciutto until peppers are tender. Add garlic; cook 1 minute longer.


Add the tomatoes, broth, basil, oregano and chicken. Bring to a boil. Reduce heat; cover and simmer for 12-15 minutes or until a meat thermometer reads 170°. Yield: 4 servings.


Source:  Taste of Home
Originally published as Tuscan Chicken in Healthy Cooking August/September 2011, p49

Tomato Bacon Omelette


This omelette was one of the most delicious experiments ever!

It was one of those mornings that I just wanted to sleep late, so The Captain made his own breakfast and left me some bacon for my breakfast.  Such a sweet guy :)  I knew I wanted an omelette since it is what I eat just about every morning.  We also have an abundance of tomatoes that need to be used up.  So I decided to make something different with the combination of tomato, bacon and mozzarella cheese.

Sorry for the awful photo, but I had to share this delicious discovery!


Ingredients:

    • 2 or 3 beaten eggs
    • 2 slices of crumbled cooked bacon
    • 1 tomato
    • 1 Tbsp butter
    • salt to taste
    • Mozzarella cheese

Directions:

Melt butter in pan and throw in diced tomatoes, add salt to taste.  Cook until tomatoes are falling apart or however you like cooked tomatoes.

Add crumbled cooked bacon.  Mix in with tomato.

Add beaten eggs, add a dash of salt to eggs before adding to pan.

Cook on one side and turn.

Top with your desired amount of mozzarella cheese.

Turn off the heat and cover the pan.

Omelette is done when the cheese is melted.


Thursday, May 29, 2014

Nacho Stuffed Chicken


Would you believe this chicken stuffed with refried beans and cheese, topped with more cheese and crushed tortilla chips is healthy?

The Captain and I will be looking into using more of Hungry Girl's recipes since we are modifying our eating lifestyle with a balance of healthy meals along with our favorites.


Recipe and photo courtesy of 
The Cooking Channel
2010 Hungry Girl. All Rights Reserved. Show: Hungry GirlEpisode: To the Mex


Ingredients


    • 1/2 cup fat-free refried beans
    • 4 wedges light spreadable Swiss cheese (recommended: The Laughing Cow), room temperature
    • 1/4 cup shredded fat-free Cheddar cheese
    • 16 low-fat baked tortilla chips
    • 1 teaspoon dry taco seasoning mix
    • 4 (5-ounce) raw, boneless, skinless lean chicken breast cutlets, pounded to 1/3-inch thickness
    • Salt and freshly ground black pepper
    • 1/4 cup taco sauce
    • Fat-free sour cream, for topping, optional
    • Salsa, for topping, optional


Directions

Preheat the oven to 350 degrees F. Spray a baking sheet with nonstick spray and set aside.

To make the filling: Combine beans, cheese wedges, and shredded cheese in a bowl. Mix thoroughly and set aside.

Put chips in a sealable plastic bag and crush with your hands or a rolling pin. Add taco seasoning and give it a good shake to mix. Transfer crumb mixture to a plate and set aside.

Place cutlets flat on a clean, dry surface, and season with salt and black pepper. Spoon filling onto the centers of the cutlets, dividing it evenly among them. Carefully roll each cutlet up over the filling (which may ooze a little, but don't worry!) and secure with toothpicks, if needed. Transfer to the baking sheet.

Cover each stuffed cutlet with 1 tablespoon taco sauce, using the back of the spoon or your fingers to coat. Coat cutlets with crumb mixture.

Cover the baking sheet with foil, and bake in the oven for 20 minutes.

Carefully remove foil. Bake until chicken is cooked through and outsides are crispy, about 15 additional minutes.

Let cool slightly and top with sour cream and salsa, if using. Enjoy!


PER SERVING (1/4th of recipe, 1 stuffed chicken cutlet): 270 calories, 4.25g fat, 780mg sodium, 13g carbs, 2g fiber, 1.5g sugars, 40g protein

Chicken-Broccoli au Gratin


The combination of chicken and broccoli is one of my favorites.  This semi-homemade recipe is courtesy of Pillsbury.  You can substitute the convenience foods to make a frugal version of the casserole.

Please note that this recipe is for two servings.


Ingredients

    • 1 tablespoon olive oil
    • 1 cup sliced fresh mushrooms
    • 1 small onion, sliced (1/2 cup)
    • 1 box (10 oz) Green Giant™ frozen broccoli & zesty cheese sauce
    • 2/3 cup ricotta cheese
    • 1 cup chopped cooked chicken
    • 1 can (4 oz) Pillsbury™ refrigerated crescent dinner rolls (4 rolls)

Directions 

Heat oven to 375°F. 

In 10-inch skillet, heat oil over medium-high heat. Add mushrooms and onion; cook 5 to 7 minutes, stirring frequently, until tender. 

Meanwhile, microwave broccoli with cheese sauce as directed on box. 

Spread 1/3 cup ricotta cheese in bottom of each of 2 ungreased 2-cup au gratin dishes or individual casseroles.* 

Top each evenly with chicken, mushroom mixture and broccoli with cheese sauce. 

Unroll dough; separate into 2 rectangles. Place 1 rectangle over top of each dish, tucking corners into dish as needed. 

Place dishes on cookie sheet; bake 20 to 25 minutes or until tops are golden brown and edges are bubbly. 


Notes from Pillsbury:

*Recipe can be made in ungreased 8-inch square (2-quart) glass baking dish. Spread ricotta cheese in dish; top with chicken, mushroom mixture and broccoli with cheese sauce. Arrange dough rectangles over top. Bake as directed.

Wednesday, May 28, 2014

Blackberry Cheesecake Squares


When it is any type of cheesecake, it gets my attention.  

I saw Ree make this cheesecake on The Pioneer Woman this afternoon and what I loved best (besides it being cheesecake) is the crust.  Vanilla wafers and pecans sounds like a delicious crust that I'd like to try out real soon.


Recipe courtesy of Ree Drummond
The Food Network
SHOW: The Pioneer Woman
EPISODE: Make Ahead Potluck


Ingredients

Crust:

    • Cooking spray, for spraying foil
    • One 11-ounce box vanilla wafers
    • 1/2 cup pecans
    • 1 stick (1/2 cup) butter, melted

Filling:

    • Three 8-ounce packages cream cheese
    • 1 1/2 cups sugar
    • 1 1/2 teaspoons vanilla
    • 4 eggs
    • 1/2 cup sour cream

Topping:

    • 4 cups blackberries
    • 1 cup sugar
    • 1 tablespoon cornstarch


Directions

Preheat the oven to 350 degrees F.

For the crust: Line a 9-by-13-inch rectangular baking pan with foil and spray with cooking spray.

Place the vanilla wafers and pecans into the bowl of a food processor and pulse until the mixture becomes crumbs. Add the melted butter and pulse again until combined. Pour the mixture into the prepared pan and press the crumbs into the bottom of the pan. (If they come up the sides, that's okay!)

For the filling: Beat the cream cheese, sugar and vanilla together in a medium bowl with an electric mixer until smooth. Add the eggs one at a time, beating after each addition. Add the sour cream and mix again.

Pour the filling into the crust, smooth the top and bake for 50 minutes. Turn off the oven, open the oven door and allow the pan to sit in the open oven for 15 minutes. Remove and set aside to cool.

For the topping: Add the blackberries, sugar and 1/4 cup water to a saucepan or skillet. Bring to a boil over medium-high heat and cook until the juices thicken slightly, 4 to 5 minutes.

In a small bowl, make a slurry by stirring together the cornstarch and 2 tablespoons water until smooth. Add the slurry to the berries, return to the boil and cook for another 1 to 2 minutes. Turn off the heat and cool the mixture.

Pour the blackberries over the cheesecake and place the pan into the fridge to cool and set for at least 2 hours (several hours is better).

When ready to serve, remove the cheesecake from the pan by lifting the edges of the foil. Slice into 15 pieces with a long serrated knife.


Marinated Zucchini and Summer Squash


The Captain and I are looking for healthier alternatives for snacks and side dishes and these grilled marinated veggies are perfect!  Finding new recipes for marinades and sauces will be great for variation for both veggies and meats.


Recipe courtesy Giada De Laurentiis
The Cooking Channel


INGREDIENTS

    • 2 tablespoons white wine vinegar 
    • 2 tablespoons fresh lemon juice 
    • 1 tablespoon minced garlic 
    • 2 teaspoons chopped fresh thyme leaves 
    • Salt and freshly ground black pepper 
    • 1/3 cup extra-virgin olive oil 
    • 1 pound zucchini (about 3 large), trimmed and sliced diagonally about 1/4-inch thick 
    • 1 pound yellow crookneck squash (about 3 large), trimmed and sliced diagonally about 1/4-inch thick 

DIRECTIONS

Whisk the vinegar, lemon juice, garlic, and thyme in a large bowl to blend. Season with salt and pepper.

Gradually whisk in the oil. Spoon 3 tablespoons of the marinade into a small bowl. Cover and set aside. 

Add the zucchini and yellow squash to the remaining marinade in the large bowl and toss to coat. 

Transfer the mixture to a 13 by 9 by 2-inch glass baking dish. 

Cover and marinate at room temperature at least 3 hours or cover and refrigerate up to 1 day.

Prepare the grill for medium-high heat. Grill the vegetables until they are crisp-tender and brown, turning occasionally, about 8 minutes. 

Transfer the vegetables to a platter. Drizzle with the reserved marinade and serve hot or at room temperature.


Tuesday, May 27, 2014

Strawberry Shortcake Cookie Bars


These semi-homemade cookie bars are a quick and delicious
 celebration of the strawberry shortcake.

Recipe and photo courtesy of Pillsbury.com.


Ingredients

    • 1 package Pillsbury™ Ready To Bake!™ refrigerated sugar cookies
    • 2 packages (8 oz each) cream cheese, softened
    • 1/4 cup sugar
    • 1 envelope unflavored gelatin (1 tablespoon)
    • 4 oz frozen (thawed) whipped topping (half 8-oz container)
    • 1 3/4 cups chopped fresh strawberries


Directions

Heat oven to 375°F. Line cookie sheet with cooking parchment paper.


Remove cookies from package; place cookies on cookie sheet. Bake 10 minutes. Remove from cookie sheet to cooling rack; cool completely. (To speed up process, refrigerate cookies about 1 hour.)

Meanwhile, line 11x7-inch pan with cooking parchment paper.

Once cookies are cool, place in food processor. Cover; pulse a few times until all cookies are crumbled. 

Reserve 1 cup of the cookie crumbs. Pour remaining cookie crumbs into pan; press in bottom of pan to form crust.
In mixer bowl with paddle attachment, beat cream cheese and sugar until creamy and smooth. Add gelatin; stir to combine.
With rubber spatula, fold whipped topping and 1 cup of the chopped strawberries into cream cheese mixture. Spread over cookie crust. Top with remaining chopped strawberries.
Sprinkle reserved 1 cup cookie crumbs evenly over dessert; gently press with fingers. Refrigerate at least 4 hours.
To serve, cut into 5 rows by 3 rows to make 15 bars, or into 6 rows by 3 rows to make 18 bars.


Notes from Pillsbury

If you're on a vegetarian diet, you can leave the gelatin out, but remember to refrigerate a little longer.

These bars can be easily frozen and served as ice cream bars on hot summer days.


Sunday, May 25, 2014

BBQ Roast Beef Nachos


Everything about these nachos sounds good!  They looked good too as Jeff Mauro prepared them on my new favorite cooking show, The Kitchen on The Food Network.  The whole thing came together very quickly with the help of a trip to your local deli.

Check out the link for the show episode which includes other recipes and great tips from that episode.


Recipe courtesy of Jeff Mauro
The Food Network
Show: The Kitchen
Episode: Weeknight Shortcuts


Ingredients
    • 1 tablespoon vegetable oil
    • 1 pound rare deli roast beef, thinly sliced and julienned
    • 1 cup your favorite BBQ sauce
    • 1 cup shredded sharp Cheddar
    • Tortilla chips
    • 1 cup French-fried onions
    • 1/2 cup pickled cherry peppers, sliced
    • Honey Horseradish Crema, recipe follows


Honey Horseradish Crema:

    • 1/2 cup sour cream
    • 2 tablespoons prepared horseradish
    • 1 teaspoon honey


Directions


Heat the oil in a large nonstick skillet over medium-high heat. Add in the roast beef, stir once and let the meat brown, about 2 minutes, and stir again. Add in the BBQ sauce and simmer for 5 minutes.

Layer the shredded cheese on top of some tortilla chips on a large platter. Pour the piping hot meat over the cheese and then top with the crispy onions, cherry peppers and dollops of the Honey Horseradish Crema.

Honey Horseradish Crema:
Mix the sour cream, horseradish, honey, mustard and salt in a bowl. Let the crema sit for 20 minutes before serving.


Tuesday, May 20, 2014

Homemade Lemonade


Since we have lemon and lime trees, I love to make homemade lemonade, but did not have a good recipe until now.

Recipe and photo courtesy of Linda Larsen, About.com . . . love this website for reference on just about anything!  The source link follows the recipe.


The secret to this lemonade recipe is to use simple syrup, made by boiling together sugar and water, then cooling. The sugar is completely dissolved and blends beautifully with the tart lemon.

Prep Time: 15 minutes

Cook Time: 10 minutes

Total Time: 25 minutes

Yield: 6 servings


Ingredients:


    • 1 cup water
    • 1 cup sugar
    • Juice from 4-6 lemons
    • 4 cups cold water
    • Mint sprigs

    Preparation:

    Blend 1 cup water and 1 cup sugar well in small saucepan. Bring to a boil, stirring frequently, until sugar dissolves completely. Let cool and refrigerate. (This is the simple syrup.)
    Mix the simple syrup well with the juice from 4-6 lemons (strained or not, as you like) and stir well. Add 4 cups cold water and mix. Try using sparkling water for some fizz! Pour into thermos or large jug, adding thin lemon slices if you'd like, or garnish with mint sprigs.
    Make more lemonade and freeze it in ice cube trays, adding the cubes to the lemonade so it's never diluted as the 'ice' melts.
    You can increase the amounts of this recipe proportionately, depending on the amount of lemonade you want.

    Source

    Monday, May 19, 2014

    Fresno Pepper Hot Sauce


    Hot Sauce is a staple in our kitchen.  

    The Captain loves putting it on all types of food and I'm learning how to expand my horizons, even though I have always cooked with hot peppers.  He makes our hot sauce and we will be sharing his recipe as soon as he puts it into words!

    The source link goes to the episode page of Fiery Foods, which includes other recipes featured on the show.

    My favorite thing she made with the pepper was the fiery compound butter she used to make a roasted chicken.  OMG, that gave me so many ideas!

    Wouldn't the hot sauce taste great in a mayonnaise sauce for sandwiches and burgers?  The possibilities are endless!


    Source: The Food Network
    SHOW: Kelsey's Essentials
    EPISODE: Fiery Foods


    Ingredients


      • 1 tablespoon vegetable oil
      • 8 Fresno peppers, chopped
      • 1 red bell pepper, seeded and chopped
      • 1/2 habanero pepper, chopped
      • 4 cloves garlic, chopped
      • 2 shallots, chopped
      • 1/3 cup cider vinegar


    Directions

    Heat the oil in a saute pan over medium heat. Add all the peppers, the garlic and shallots, and saute until softened and fragrant, 5 to 7 minutes. Then add 1/2 cup water and simmer an additional 4 to 5 minutes.

    Place the cooked mixture into a blender and add the vinegars and salt. Blend until completely smooth and pureed. Adjust the seasoning and serve.


    Sunday, May 18, 2014

    Beef and Bean Burritos from The Pioneer Woman


    Fast and easy . . . semi-homemade from The Pioneer Woman.  A delicious meal in 16 minutes!

    Burritos are one of my favorites.  Actually, The Captain introduced me to the versatility of tortilla wrapped meals and we have many meals of this type with all kinds of variation.  Coming up with new combinations is half the fun!

    This recipe comes from The Pioneer Woman's website included in one of my favorite sections . . . 16 minute meals.  Click here to go to that section of her website.


    Ingredients


      • 2 pounds Ground Beef
      • 1/2 whole Medium Onion
      • 1 can (7 Ounce) Mexican Tomato Sauce Or Enchilada Sauce
      • Salt And Pepper, to taste
      • Cumin, Oregano, Chili Powder, Garlic To Taste
      • 1 can (28 Ounce) Refried Beans
      • 3/4 cups Grated Cheddar Cheese
      • 12 whole Burrito-sized Flour Tortillas
      • Extra Grated Cheese, For Sprinkling
      • Extra Sauce, For Drizzling
      • Cilantro Leaves (optional)


    Optional Filling Ingredients: 
    Mexican Rice, Sour Cream, Guacamole, Green Chilies, Pico De Gallo


    Preparation Instructions


    Brown ground beef with onion and season to taste. Pour in sauce and simmer over low heat. Add water if mixture gets too dry.

    Heat refried beans in a saucepan. Add cheese and stir in till melted. Keep warm.

    Heat tortillas in microwave for one minute.

    Spread a small amount of beans on each tortilla. Add meat. Fold over ends, then roll up. Place two burritos on a microwave-safe plate. Drizzle red sauce over the top and sprinkle with more grated cheddar. Microwave for one minute, or until cheese is melted and burritos are very hot. Serve immediately.

    Saturday, May 17, 2014

    Amazing Muffin Cups


    I was thrilled to find this delicious looking breakfast muffin cup recipe from the kitchens of Johnsonville, my favorite breakfast sausage.

    These muffin cups would be awesome for a breakfast or brunch buffet or a quick breakfast to take with you on a busy morning.

    Love all the ingredients and would not change a thing!  

    Wouldn't it be great to have some of these in the freezer, ready for the microwave for a super quick and delicious breakfast?  Sounds like something I am going to try to have on hand for those busy mornings.  

    Breakfast is my favorite meal and I'm sure this will be one of my favorite go-to recipes!


    INGREDIENTS


      • 3 cups Ore-Ida® Country Style Hash Browns, thawed
      • 3 tablespoons butter, melted
      • 1/8 teaspoon salt
      • 1/8 teaspoon pepper
      • 12 links JOHNSONVILLE® Original Breakfast Sausage
      • 6 eggs
      • 2 cups Shredded 4-Cheese Mexican blend cheese
      • 1/4 cup red bell pepper, chopped
      • fresh chives or green onions, chopped


    DIRECTIONS

    In a bowl, combine the hash browns, butter, salt and pepper.


    Press mixture onto the bottom and up the sides of greased muffin cups.

    Bake at 400°F for 12 minutes or until lightly browned.

    Meanwhile, cook sausage according to package directions; cut into ½-inch pieces.

    Divide sausage among muffin cups.

    Combine the eggs, cheese and bell pepper. Spoon over sausage. Sprinkle with chives.

    Bake for 13 to 15 minutes or until set and an internal temperature of 165˚F is reached.


    Friday, May 16, 2014

    Chocolate Lava Pie


    When I saw this pie on The Chew the other day, I have had a craving for it that is unbelievable!  

    It is a program I don't often watch out of protest for taking the place of my beloved soap opera All My Children cancelled by ABC, but I happened to be at my mom's house and she watches it religiously.  This pie may have broken the ice for me . . .

    The pie reminds me of one of my all time favorite pound cakes that I will have to dig through my personal collection of recipes to find . . . it is called Tunnel of Fudge Cake.  It is part brownie, part pound cake with a fudgy center. Different type of texture than this pie, but the concept is very similar.  I promise to share the pound cake recipe soon!

    The only thing missing in that photo is a scoop of vanilla ice cream!

    Recipes for pie crust and salted caramel sauce listed separately.


    ingredients


      • 1 disc of Perfect Pie Crust
      • 12 ounces Bittersweet Chocolate
      • 1 cup Butter
      • 5 large Eggs (room temperature)
      • 1 cup Sugar
      • 1 tablespoon Vanilla Extract
      • 1/3 cup Flour
      • 1 teaspoon Salt
      • 1/2 cup Semi- Sweet Chocolate Chunks
      • 1/2 cup Chopped Nuts (pecans & walnuts; toasted)
      • Salted Caramel Sauce (to drizzle)


    directions

    Preheat oven 350°F.

    On a lightly floured surface, roll out the dough to 1/8" thickness. Place inside a pie dish and line with parchment and baking beans or weights. Blind bake for 8 minutes. Carefully remove parchment and beans and bake for 4 additional minutes.

    Remove from oven and allow to cool.

    In a small, heavy bottomed saucepan, melt Chocolate and Butter over low heat. Let Chocolate mixture cool. (Alternatively, Chocolate and Butter may be melted in the microwave. Be careful not to overheat and burn it.)

    Using a mixer, whisk Eggs and Sugar until thickened and lemon-colored; blend in Vanilla. Sift Flour and Salt together and fold in; blend in the Chocolate mixture on low speed until thoroughly blended. Fold in the Chocolate chunks.

    Pour into the pie crust and bake for 20-25 minutes or until slightly dry on top and slightly jiggly in the center.

    Remove from oven and allow to cool for 10 minutes before slicing.

    Garnish with toasted nuts and a drizzle of Salted Caramel Sauce (click for recipe) to serve.


    Helpful Tips:

    1. Blind bake the crust. Blind baking is baking the crust once without the filling. Use wax paper with beans on top to keep the crust from bubbling.

    2. Whisk the chocolate together until the butter is fully incorporated.

    3. Let the pie rest for 10 minutes and then serve. If making this pie ahead of time, re-warm in the oven or microwave.


    Salted Caramel Recipe


    Salted Caramel is great sauce for so many things!  

    My favorite is popcorn or ice cream :)

    This recipe for Salted Caramel is courtesy of Carla Hall, The Chew.


    ingredients

      • 1 cup Granulated Sugar
      • 6 tablespoons Unsalted Butter
      • 1/2 cup Sour Cream
      • 2 teaspoons Kosher Salt


    Heat sugar on moderately high heat in a heavy-bottomed 3-quart saucepan. As soon as the sugar begins to melt, stir vigorously with a whisk or wooden spoon. As soon as the sugar comes to a boil, stop stirring.

    As soon as the sugar crystals have melted (and the sugar is dark amber in color), immediately add the butter to the pan. Whisk until the butter has melted, then remove from heat.

    Slowly add the sour cream and continue to whisk to incorporate. Add the salt. Whisk until the caramel is smooth. Let cool in pan for a couple of minutes before pouring it into a mason jar. Let cool to room temperature. Store in fridge for up to 2 weeks. Warm before serving.


    Do you really think it would last 2 weeks?


    Perfect Pie Crust


    Doesn't everyone need a great pie crust recipe?


    This recipe is courtesy of Carla Hall, The Chew!


    ingredients


      • 1 tablespoon Sugar
      • 1/2 teaspoon Table Salt
      • 1/3 cup Water
      • 1/2 pound (2 sticks) cold Unsalted Butter (cut into 1/2-inch dice)
      • 2 1/4 cups All-Purpose Flour (plus more for rolling)


    directions


    In a small bowl, dissolve the sugar and salt in the water. Refrigerate until very cold, about 30 minutes. During that time, refrigerate your butter, flour, mixer bowl, and paddle, too.

    Make sure your butter is cut into 1/2-inch dice. Bigger pieces will make your dough puffy. In the chilled bowl, combine the cold butter and flour. With your hands, toss the butter in the flour until each cube is lightly coated.

    With the chilled paddle, beat the flour-butter mixture on low speed to just break up the butter, about 30 seconds. Add the water mixture all at once and raise the speed to medium-low. Beat just until the dough comes together in big chunks, then immediately turn off the mixer.

    Divide the chunks of dough in half and very gently pat each group into a round 1-inch-thick disk. Wrap each tightly in plastic wrap and refrigerate until firm, about 1 hour, before rolling. You can refrigerate the disks for up to 1 day or freeze for up to 3 months.


    Helpful Tips:


    1. Make sure that all the ingredients are cold.

    2. Mix with your fingertips, not your palms. Fingertips are cool, while your palms are hot.

    3. When mixing the flour and butter, pick up some of the flour and butter, squeeze it, and drop it.

    4. Make discs with the dough -- rather than a ball -- so that it is easier to flatten.


    Visit Our Etsy Shop